I've decided to write these strats in random order. This isn't interesting or useful information for you, but I thought I'd share my thoughts with you anyway. As such, this is not the first strat I'm writing today, so it won't have a first page feel to it. I'm not going to start explaining a lot of the terminology here or set up characters which will become important later in the book. Book? What on earth am I talking about? I knew I shouldn't have had that drink before starting this. Well, craziness aside, here we go. 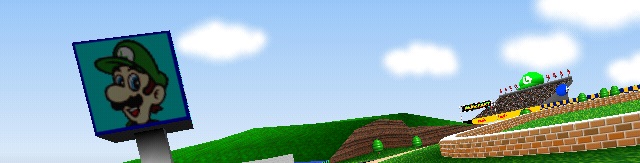 Imma Luigi Raceway. Number 1. Luigi Raceway. How can I explain this in terms everyone will understand. This is so easy it's actually painfully hard. It's by far the most overplayed of all 16 tracks just because it happens to be the first one. One of the fundamental things you'll learn about life, is that as unique as everyone in the world is, as a group we're pretty damned predictable. I'm not sure anyone would describe this as their favourite track though. It also has one of the hardest WRs in the game. The standards (on the 3lap) are also quite difficult. To sum up my thoughts on this, the 3lap God will not be the first God time you get. If you set out to prove me wrong, you're a lot sadder than I thought you were and I know where you live. I wonder how much I can waffle on here without actually giving any strat advice. Back when I first got the game, this was the first track I played and it felt really weird compared with super mario kart (which I'd played one night a few weeks previously). I remember driving around without doing any MTs and shaking my head thinking "No, no this won't do at all". The real power of this game, and what sets it above all contenders, is the power of the MT. The delicacy of the timing, and the never ending struggle for the perfect MT is what makes the game endlessly playable (for obsessive compulsives like ourselves). Now, after all my rubbish talk about not making this sound like a "first" strat, I actually yabber on about the fundmental aspect of the game. Figures. This is one of the 3 courses with a preprogrammed course ghost on it. If you somehow manage to drive in the right direction for 3 laps and not hit the many hazardous obstacles which lay in your path (For this, you should read "If you're not a complete idiot"), you may go fast enough to unlock this most devious of course ghosts. Watch in sheer terror as the ghost completes a complicated set of MTs around the bends, and uses its ever fiendish "shroom out of the tunnel" strat which us mere mortals can only begin to comprehend. If you ever manage to beat it, all I can say is "Congratulations! You have now reached the rank of 'Knowing where the A button is'". I'm being a little unfair here. Although it is technically possible to beat Luigi without MTing (and it's fun to try this, especially if you use his shroom strat), it sure does help a lot. 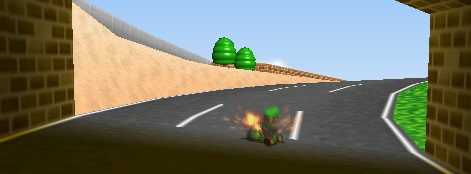 Luigi. The Original Strat Master. The first corner of this course, is probably the first place a lot of karters learn how to MT. This is not a handheld guide, so I'll leave the lesson in how to MT to the tips on other peoples pages. Speaking of other people, there's something which really annoys me about this course that I'll get to in a little while. First off let's get the super duper everett boost start extraordinaire. If you don't know what an everett boost start is, look here. If you don't know what a boost start is, kindly turn off your PC, walk away, and never let me see you again. You've been a bad bad person. OK, so back when I first found a strat online for this course it said "Get the boost start and drive in a straight line for the first corner". This is more or less what I do, except that my straight line is a little crazy in that it goes left and right across the road and in real life would probably get me arrested for drunk driving. This method of crazy driving is also known as "doing SSMTs". These are exactly the same as MTs except that we call them something different. Such are the mysteries of Kart. So, although you can do either a left-facing or right-facing SSMT from the start, I always do a left-facing one. And now you will too. You should work it up to yellow and hold it until the boost is about to wear off and then turn it to orange (I may call it red at other points in this strat guide, because red is a much cooler colour. Oh, also I'll type colour instead of color, because that's how it's actually spelled!). So after you've performed this SSMT, straighten up and glide a little before doing another one. If you can't do SSMTs yet, don't worry about it. You can just drive straight for the first corner instead. A poorly performed SSMT will cost you more time than regular straight driving anyway, although I don't necessarily think it's ever too early to start trying SSMTs. Back to the 2nd SSMT. This is actually interesting, because this is something I don't know. There's a slight hill here in the road, and I'm not sure if it's faster to release your SSMT going up it, going down it, or if in fact it matters at all. Feel free to experiment with the idea. You'll probably naturally end up releasing it at the top of the hill anyway. 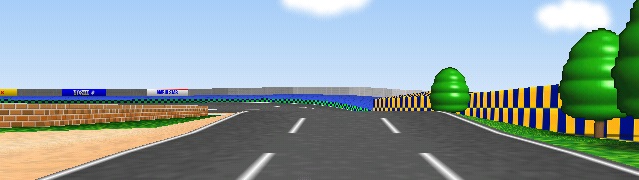 The hill is alive, with the sound of MTing Alternatively you might want to try the simple 2 SSMT approach to the first corner, which will require you to glide a little further from the first SSMT. This is (from my experience) a little slower than the 3 SSMT approach. Now, after releasing the 2nd SSMT and straightening up and gliding, you'll want to quickly perform the 3rd SSMT. I needlessly say "quickly" here. Everything you do should be quick, but you'll find you have little space before the corner to do it, so you'll feel like you'll have to be quick to manage it. As with the other 2, straighten out and glide along the side of the turning corner for a little bit. Just as you reach the corner and it starts moving away from you, you should immediately jump into an MT and stay as tight to the curve as you can, whilst you're on white smoke. You should really attack this part of the MT without straying into the sand. When you move it to yellow, you should think about straying slightly away from the curve, and then move it to orange and release. Then you must glide for a fraction. Although I don't straighten up after these MTs, it might be an idea to attempt to, but whatever you do, you must wait and glide after the MT before jumping into the next. A common error new people make is to try and MT too much around this corner. The optimal number of times is 4. If you want, you can race a ghost using 4 and try to beat it using 3 or 5 to compare the difference yourself. Now, on the 4th MT you can do one of three things, and you should time your 4 MTs on this corner to adjust to these. You can either hold it all the way around the corner until you're on the straight, or you can release it a little earlier, so that your kart is driving along the edge and going slightly to the right. Or thirdly, you would be forgiven for finishing this final MT and aiming straight for the right side of the tunnel and not doing an SSMT here. You will lose a little time by driving straight, but not too much. This is not the thing that annoys me that I referred to earlier. The thing that annoys me most about this course, is the right-facing SSMTers. It's completely and utterly unnatural, and in my opinion unnecessary. Every vid I have ever seen in the past 4 years shows someone do a right-facing SSMT at this point. Every one. I dislike the right-facing SSMT, because it feels so weird to perform it after 7 consecutive left-facing ones, but I dislike it even more because everyone does it. Because the only reason everyone does it, is because they've seen the vids of other people doing it, and the only reason the people in the vids did it, was because _they_ saw a vid with someone doing it, and so on back to the source. The source, of course, in this instance, was clearly Satan himself. Why he likes playing Mariokart64 though, is a matter for philosophers and poets and not something I'll go into here. It is far far far far (that's four fars. Count em!) easier to perform a left-facing SSMT on this little straight before the tunnel and I don't believe it's any slower than the right-facing one. This is my belief, but you _must_ experiment yourself! I don't have all the answers. If everyone started doing a left-facing SSMT here just because they read my rant, then that's just as bad a reason to do something as the right-facing SSMTers had. If you learn one thing reading this page, it's don't be a sheep! Respect the strat advice...but don't be a slave to it. Also, sheep don't make good Karters. They don't have the fingers for it. The Tunnel! *plays dun dun DUNNN sound*. This is the only real feature this course actually has. When you think about it, the entire design isn't all that imaginative. If there was an award going for most interesting course layout, Luigi Raceway would be hiding embarrassed in the Limo outside, waiting for the other courses to leave the ceremony. But it's got a tunnel. You gotta give it some credit. As with any solid object in the game, eventually you'll actually hit it. Don't worry, it's only actually embarrassing if someone else saw you do it, but know that secretly I'm laughing at you. And did you ever walk past a group of people in the street and suddenly they start laughing and paranoia kicks in and you think to yourself "Hmm, I wonder if they're laughing at me?!?". Well now you know. It's because you went smashing into the outside wall of the tunnel. (Btw, seriously, if you do get paranoid about people laughing as you're passing them, remember the second rule of life. You're not that important. People aren't actually paying attention to you enough to be laughing at you.) Anyways, you MT in, and you MT out. Baddabing, baddabang! That was the tunnel. :) 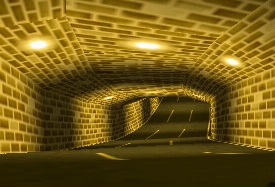 Tunnel vision *coughs* There's a little more to it than that of course, so let me waffle on about it! You've read down this far God help you, and you're going to see this strat through til the end if it kills you! You must stay tight to the wall of the tunnel as you're MTing. This might seem obvious, but this will also mean that when you let go of this MT, you'll actually hit off the side of the tunnel. This is good! Hitting the side is healthy. Add some fruit to your diet whilst you're at it. The important part is that after you've finished the MT and you've hit the tunnel wall, you should be driving straight and still in the rightmost lane. This shouldn't be too hard to do. Now, for the adventurous amongst you, you might want to try to do an SSMT in the tunnel. Good luck to you! Knock yourself out. What's the worst that could happen? Well I guess whilst you're trying to master this tunnel SSMT, the world could explode, but that probably would have happened anyway. It almost feels like there's enough room to fit in an SSMT here, but it would be difficult to do, and even if it turned out to be quicker, it would probably be hard to prove. The exit MT is quite a bit more tricky than the entrance one. It's tricky, not because it's uphill, but because the surface is uneven. This means that after you perform your MT here, you can get slowed down by the road itself. This is quite annoying, and you almost feel like getting angry with the road, until you realise how silly that would be, but I'm not sure of a way to combat this unevenness consistently. As for how to actually do the MT, that depends on how many shrooms you're using. For a 0 shroom lap, you should really stick to the rightmost side of the righthand lane on exiting. This is actually good advice for 1 shroom and 2 shroom laps too. On a 3shroom lap though, also known as the flap ("flap" in this instance has nothing to do with birds or planes, but actually stands for "fastlap", although I think a better name for it would be "flying lap". You see what I did there? Working in flying with the word flap? No? I'm wasting my best material on you people!) Anyways, try to work your MT so that you don't get slowed down by the hill. Now we must go our separate ways. Everything, on all 4 different types of lap is pretty much identical up to this point, but now I must deal with each lap in turn. Since I feel like confusing people I'll start with the 3 shroom lap and work down to the 0 shroom lap. Flying fast flap of doom: Oh yeah! This is the easiest of all 3 to describe. You basically aim for the grass with your tunnel exit MT. Actually you're aiming for where the wall on the last corner turns. You can't see it from the tunnel, but use the force, and/or your memory. Then you jump into a slide before hitting the grass and use your first shroom. Hug the wall as tight as you dare to. Pretend it's an old friend, or a hot chick. If you _are_ a hot chick, eh, pretend it's a guy. Wait until the shroom wears out and use the 2nd shroom. (Well don't actually "wait until the shroom wears out". What kind of advice is that William? Geez. You should fire your 2nd shroom just before it wears out. No sense going "Oh look, I'm slowing down, I guess I'd better use another shroom". *shakes head sadly*) So, hold this 2nd shroom until it's just about to wear out and use the last one. Here you want to time it so that you release your MT (You _were_ working up an MT around that bend weren't you? I didn't say it, but also I didn't tell you to keep breathing in and out) at the exact same instant that you reach the road and that your shroom wears off. Then drive straight for the line. That's proper straight, and not crazy ssmt straight! *cue flashback music* Oooh, that was weird because I actually heard it in my head just there. Anyways, let's go back in time and see if we can see how to do the 2shroom method. *hops into time machine and reappears several seconds earlier, just in time to see himself hop into the time machine* Hmmm, well that was completley and utterly useless. So: 2 Shroom method of absolute madness: I've given this an exciting name because it's actually the least exciting of the three. After getting your MT from the tunnel and driving up the hill, you should MT into the grass making sure to release the MT before you actually touch the grass. This is something I've come to see as second nature, and don't question. I guess it's slightly possible that it doesn't matter whether you release the MT inside or outside the grass, but only slightly. Anyways, shut up and release it on the road. I'm tired and cranky and want to go to sleep here. Glide a little from this MT, but I wouldn't glide as much as you would for a normal MT, before hopping into a slide and hitting your shroom. Hug the wall as before. If you don't know what I'm talking about, go and read the flying fast flap of doom above. It's cool. It's got dragons in it! So basically you perform this 2shroomer a little like the end of the 3shroomer, except that you'll be forced to leave the grass/sand sooner. Now, before I move on here, it is possible to vary this strat a little. I've even toyed with the idea of not getting an MT into the grass to begin with. Just shroom from the edge of the grass (a little further up the road than where you'd start the 1st shroom of the 3shroomer), and exit the grass/sand a lot further back than normal. This sounds like an awful strat, but I actually started to get decent times with it, so feel free to experiment with that if you feel like a change of pace. And now for something completely different: The tale of the 1shroomer and the mystery boost: A long time ago, in a galaxy far far away, a lot of really cool interesting stuff happened. However in our own galaxy, a few years ago, something bad was going on. People thought it was cool to horde strats. They kept them in their rooms and didn't let them out to play with all the other strats. The other strats would knock at the door and say "Is little Tommy coming out to play", but they'd only get the response "I don't know what you're talking about. Tommy doesn't exist. Go away and see how great I am from a distance." Ok, so my analogy needs a little work, but basically the mystery boost was known about for ages and ages, but only in the past year or so have we really figured it out for ourselves. And by "figured out" I really mean "come to understand why it happens sometimes". You set up your 1shroomer a little like your 2 shroomer in that you MT into the grass. Note, that I've said "grass" here, and up there, and up further, when I actually mean "sand". It's sand you hit first when you leave the road, not grass. I get it. Get over it. 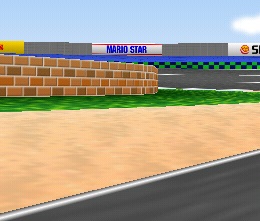 Sand. Often mistaken for grass. Anyhoo, you want to let this glide a little more than you let your 2shroomer glide. You do that because you only have the 1shroom and you want to make the most of the little guy that you can. So after you've glided..eh..glid..whatever. After you do that thing, jump into a slide and use the shroom to hug the corner (see hugging corner advice again. Yeah I know there were no dragons). It's at this point that the mystery boost kicks in, or more likely it's at this point that the mystery boost completely fails to happen. The boost can happen in two ways. Firstly, it can happen purely by chance as you release your MT near the wall at the end of the shroom. Secondly though, you can force it to happen by actually hitting the wall as you release your MT at the very end of your shroom. There are vids out there that will help you to do this. I can't really advise you any further, only that when done right you'll notice that you don't slow down as much, and you'll fly away from your ghost. The last part of the 1shroomer strat is simply to MT out of the sand and SSMT before the line if necessary. And now finally: Stayin on the road: So you've lost your shrooms. You've got nothing but your wits, your kart and the open road. Here's what you do. You've exited the tunnel on the righthand side of the road and now you want to jump into a quick left-facing SSMT. This is the hardest ssmt to perform on this course, so don't worry if you find it a little tricky. The last corner turns quite sharply, so it's a definite adjustment from the first corner. In a lot of ways though, you can feel freer with this corner. You can throw yourself recklessly into sharp MTs, but it's quite important to keep extremely close to the bend. The optimal number of MTs to do is 3 on this last bend, and the last one should be done so that after you've straightened up and let it glide, you're still in the leftmost lane. You must also SSMT one last time before the line. So that's pretty much it! I'd advise doing a 1-2-0 strat on this course. It'll help you to practice doing that mystery boost, and also releasing the last SSMT at the end of a 0shroomer feels timed just right. Alternatively you can do a 0-0-3 strat, which works out slightly slower, but which will mean you can go for the 3lap and the flap on the same attempt. This strat will also help to improve your 0shroom laps. Finally, you might want to attempt the "crazy" 1-1-1 strat with 3 mystery boosts in a row. I'm not sure where that strat would fit in speedwise, but it would be good to find out! Finally, a small piece of advice for the flap would be to start an SSMT up from behind the line and release it just before the lap starts. You can also start this ssmt from the grass on the left just before the line, so that not only do you get an MT on the line, but you also don't have to straighten your kart out. This will only save you a few hundreths though. Now, I say goodbye. Good work getting this far, and good luck with the course. :) 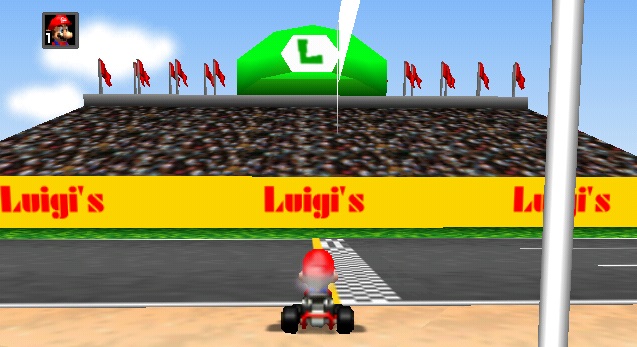 Mario pays a visit to his brother's Raceway |