I'm something of an expert at this track. In fact, I'm fully versed in the many and various ways you can completely mess up a PR run here. For a far more entertaining read than this, here's something I wrote earlier.
Anyway, for those of you who would like to continue or if you've just come back from that link, let me talk more about this wonderful course. I have to say that I actually like it. I guess I ought to maintain some sort of objectivity as a strat writer speaking to the masses here, but I don't care. This is one of my favourite tracks. I can't really say why. Maybe it's the decor? Or maybe the fire breathing statue of bowser? I'm pretty certain it's not the thwomps. As my grandma always used to say to us when we were growing up, "Nothing that chases you down a corridor, and then attempts to crush you, can be all that good!". We didn't know what she was talking about. We'd just sit there, and nod and smile. We actually had her committed when she started mumbling about a lava bridge and the stairs after it. Who knew?
 Abandon all hope ye who enter here! A ghost of a chance The race starts as usual, with the little guy coming down on the cloud with the flashing lights. It's all a bit trippy. What you want to do is to jump into a right-facing slide from the start and aim for the corner on the right after the bridge. When your start-shroom wears off, fire another one immediately, and cut across the grass making sure not to hit any of the bushes there. When *that* shroom wears off, hit another one and aim for the next corner to the left, finally firing your third shroom and driving straight into the next room with the 2 floating thwomps. Don't worry about turning right and driving down the room like you normally would. In fact, do *not* do this. Just brake and stay near the top of this room, well off the racing line. What we're doing now is we're removing these guys from all future BC runs by distracting them. These guys have 3 states. 1) Sleeping 2) Looking 3) Moving and Crashing Your job is to find a spot to wait in where they aren't constantly sleeping. If they're asleep, they're not registering you as being in the room, and your future self on other runs will wake them up instead. So they should be moving a crashing pretty constantly for you. Keep watching them just to be sure. There is a very small period of time after they wake up and go into "Looking" mode (less than half a second), where they might see both you and your future self, and decide to chase after him instead. It's rare but can happen. This is just bad timing, and can be fixed by either getting faster, or setting a slightly different distract ghost. So anyway, you should wait here until your 3rd lap future self would have been passed (about 2 minutes is easily enough time), and then you should complete the 3 laps and set this ghost. After you do this, try to save this ghost to a memory pak if possible, so you'll never have to do it again. This ghost is the most important ghost in the game. It will completely remove these two thwomps from your life, and it will be filled with sunshine forever more. (Note: sunshine not included. Terms and conditions apply) The actual strat I say "The" actual strat, but it's more accurate to say "An" actual strat, as there are a few different options coming up for you to take, most of them involving driving forward. So let's start at the start! The guy on the cloud appears and counts you down to your everettstart. Now you should really get used to sliding from this start. You should get used to sliding anywhere you shroom. If you're ever shrooming and driving in a straight line, you're probably doing it wrong. You can drive straight of course, as it's easier and you won't hit the wall or fall in the lava (bonus points if you do), but in the long-term, and the short-term, and most terms, sliding is best for you. Also, apples. Apples are always good. So next up is the first corner. The first corner There are two main ways to take this first corner, and both ways will unfortunately lead you to slam into this wall. It's important to keep in mind though whilst concentrating on not hitting this wall, that every hundreth saved at this part of the first lap, as you get faster, only counts for half, due to the final sliding thwomp. That's in the future though, and there's a whole laughing thing going on, and, well it will make sense when we get there. Anyway. The first way to take this corner is to keep sliding from your shroomstart slide, and fire your first shroom just as you get to the corner and the shroom is wearing off. Then you can go hurtling across the grass with glee. The second way is to get an MT off the start-shroom, and hop into a shroomslide once you reach the grass. There are only hundreths between both of these methods so you can experiment with what feels best for you. On lap two you'll be doing neither of these 2 things on this corner. After the SSMT near the start/finish line, you should be driving perfectly straight for this first corner. You then simply hop once into a shroomslide across the grass. The Grass Many times in your life you're going to encounter obstacles that you have to overcome. Here, on BC, that obstacle is a small green bush. With a wicked sense of humour, the course designers have placed it right in the way of a shroom. Of course, one could say that it was Bowser who placed it there. He's the guy whose statue is blowing fire at you. You don't get to see that much of course, as you're busy shrooming across the grass, and you really should never see him breathe fire unless you're setting up a flap attempt. Anyway, it's quite impressive. Go check it out! But back to the bush. There is just enough room on the righthand side of this bush to make it through unscathed, but the odds of your success are very small, so for the first lap at least, I advise not going this way as it doesn't actually save much time anyway. The most consistent way is to drive around it to the left and to cut as much grass as you can before releasing your MT onto the road. 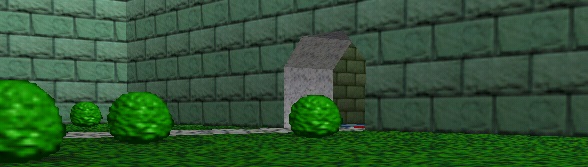 Left? Right? You can't escape the bush. The random thwomp room featuring Marty Marty is the green thwomp in the cage at the back of the room. He's famous. The other thwomps are just jealous and that's why he's in the cage, a little like rudolph the red nose reindeer. Now, if you've cut the previous corner quite tightly as you should, you're going to run the risk of hitting the first blue thwomp here. He's slowly lifting off the ground and really wants to ruin your day. He doesn't know about retries, so he actually thinks you'll fall unconscious when you slam into him and probably need to go to the hospital. He's mean. Anyway, try to stay to the left of this guy. You should be able to do this without compromising your line to the next corner. The twin corners These are nothing special, but it's very easy to hit these corners very slightly and for them to clip you and slow you down. Just get quick MTs around them, and prepare for the next room. This next room is where many runs are lost. Actually this is a course where so many small things can go wrong that it's not really fair to pick this place out in particular, especially since you went out of your way to get rid of half the problem before even starting. The eye of the needle Now if you set a ghost, the floating thwomps that chase you should be distracted. If you didn't set a ghost, then they'll chase you and you deserve to be squished. That'll teach you! Now, not even a hundred ghosts are going to distract the two guys at the end of the room. They are guardians of the sacred hallway of lamps, and they don't like visitors. The problem with these guys is that they're at different positions on each lap, and at each new speed you reach, so you'll have to adapt your run depending on where they are on each lap. Before you get to them though, a very short time after you MT into the room, you might want to get an SSMT. There's just enough time and space to get one here and for it to be beneficial to you. Now, as for what to do when you get to the thwomps... You have a few options. If both guys are blocking, by far the easiest method of passing them is to slide around from the left. This is where the biggest gap will be and probably what a lot of people will do, even into the Legend ranks. Because they're usually both down for everyone on lap 1 though, people have inevitably tried to go straight through the middle of them with some measure of success. This takes a lot of practice to get done right, and still get a nice release on an MT after it. My advice if you want to do this, is to start your slide from just right of center of both thwomps and slide into the gap to the left and back right after it. It is of course also possible to pass them both on the far right, but it will compromise your exit MT greatly. If either or both of the thwomps are up in the air, count your blessings and take full advantage. The kart Gods are smiling on you. For a fast lap attempt, you'll want to time your run so that the guy on the right is up in the air when you get to him. A first lap of around 48(40 in ntsc) seconds should work ok. The sacred hallway of lamps This hallway is incredibly well lit, and there's not a lot else going on that you need to be aware of. It's here that you'll start to get paranoid about the positions of the sliding thwomps in the next room. Something that you'll probably not notice at all about this hallway, is that you're driving significantly uphill. I mean this is the whole reason you have to drive down stairs later on. I didn't know this til like 4 minutes ago. The next time you're driving here, turn around at the end of this corridor to see how far up you've driven! Now before turning into this next room, this next corner is slightly different in that it has a slight diagonal edge to it which can slighly unsettle you when releasing your MT around it. It means you can release the MT slightly earlier than usual, but be careful if you're driving very close to this corner. 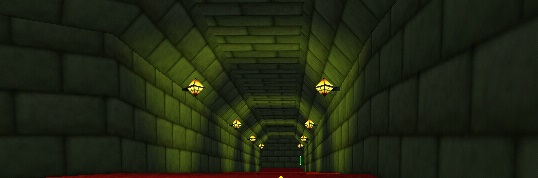 How did I get this high? The sliding laughing thwomps These guys are both very happy, and in contrast to the other silent blue thwomps, these guys are laughing as they slide back and forth. None of the other thwomps laugh at you, except for a certain green guy in a cage if you go to visit him. He probably liked to slide too, and they probably just think your little kart is funny, but make sure you get the last laugh by avoiding driving into them. It can be quite hard to avoid the first guy in this room as you will see him very late and have to make a split second decision whether to go to the right or left of him. You should know by the time you get to the second guy where you're trying to aim for. This is just a feeling you'll learn from experience. The experience of repeatedly bashing into them. Four mini-bowsers will blow fire at you, but it's just a cool effect and perfectly harmless. On the first lap, when you get sufficiently quick, the final thwomp will be in your way and you'll have to go ever further to the right to pass by him safely. This is why saving extra hundreths on lap 1 doesn't do you much good. Normally MT around this corner at the end of the room, but because of the diagonal aspect, you can again let it go earlier than normal. The lava room For some inexplicable reason, Bowser has a room with nothing but lava and a bridge. I mean I've heard of people having indoor swimming pools but this is just ridiculous. The bridge doesn't even have nice handrails like the ones on YV and DKJP. It's definitely something to consider putting in Bowser's suggestion box. "Lava Bridge is a Safety Hazard. Thanks." He takes those suggestions seriously you know. Really! One suggestion I'll make here is to not to attempt an MT for the next corner unless you really need those final tenths. The easiest way to navigate the corner before the stairs is to hop to the right from the end of the bridge on the lefthand side. If you really want to MT around this corner, my suggestion is to start the MT quite earlier on the bridge and try to angle your slide so that you get as little airtime as possible when you reach the end of the bridge. Mistiming anything at this part of the run will mean a ridiculous stairs part and will pretty much mess up the entire attempt. 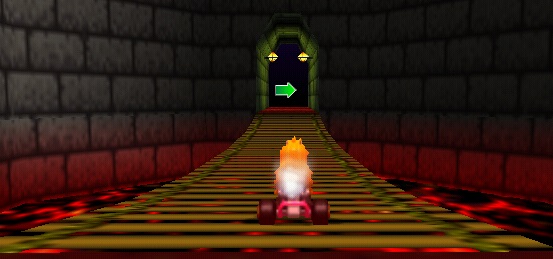 Nobody rock the rope bridge! The ridiculous stairs There are portraits of Bowser on the walls lining the stairs. He's likely to be secretly peeking out behind the eyes of one of them watching you try to gracefully drive down the stairs. It's impossible of course to do this gracefully at all, and even harder if you've released an MT before them. The key to the stairs primarily is to pick a direction and stick with it. Any variation from you mid-stair can be catastrophic. The direction you should pick is to aim for the right near the wall by the exit. This will allow you to hop frantically around to the left in a nice arc that will be neither too sharp or too wide. Again, experimentation with where to aim for that suits you best is key. You may also be tempted to hop early near the bottom of the stairs, which can be quicker, if more unpredictable. 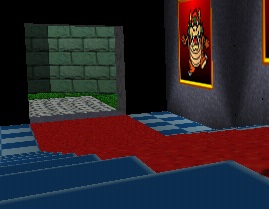 Ridiculous stairs at a ridiculous angle Grass-hopper From the bottom of the stairs you'll need to first jump into a slide and then start to hop when you get close to the grass. The key to this part is to be in the grass for as short a period as possible and to cut the corner as much as possible. You can gain or lose tenths here. For a lap attempt, you will use your 2nd shroom right here to get back on the road, and once there, slide into the MT for the next corner. The shroom should almost keep you going til you reach it. For a normal lap though, you'll want to just normally MT out of the grass as soon as you feel you've hopped enough. Hopping is also probably good exercise, and you should have another apple. 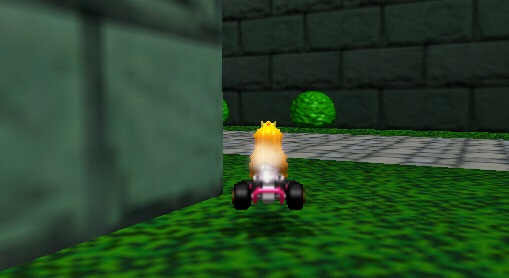 You've hopped enough To SSMT or not to SSMT The next corner has a piece of grass beside it. This grass won't slow you down too much, so your MT around the corner should be across this too. It's here that you'll have a choice. You can choose to SSMT before the spiral, or not to. Experimentation is inconclusive as to which is better, so when two things seem of equal value it's probably wisest to do the easiest. The easiest thing here is to just drive in a straight line. Of course, in complete contradiction to what I just said, when two strats seem to be equal, but one is a lot harder to perform, the harder one is probably the quicker, as it likely hasn't been fully perfected yet. But forget that for now, and just drive straight like you're told! If you're on a lap attempt, you may want to use your final shroom here and slide into the MT for the spiral. The spiral of painful bounces This is the only corner in the game that you can't take at full speed without hitting into the walls. The key is with the bounces and the timing of your hops. With all the practice you got earlier, you should be in good shape to do this part. The first part is a simple MT. Prepare the MT as you approach the spiral, and release it so that you drive as close to the lefthand wall as possible and then start hopping like your life depended on it. When you hit the wall, you can get healthy or unhealthy bounces. An unhealthy bounce will actually send you backwards, whereas healthy ones will bounce you a decent amount whilst you retain your speed. Not bouncing at all is much slower though. I try to time my hops so that I hit the wall whilst in the air, but you can tinker around with it too. A final point to mention is that occasionally when getting the MT for the spiral, you can snag the inside wall, and get turned quite sharply around to the left and not hit the outside wall at all. It's a very rare occurence, and it does slow your kart down in the process, but for a lap attempt, having your 3rd shroom here may be better than the pre-spiral one. 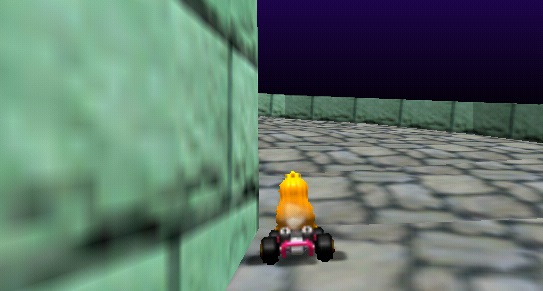 This is gonna hurt. Why do you make me do awkward MTs? When you're done with the spiral, and really, what kind of spiral was it anyway? The Rainbow Road one has its own shortcut named after it, and you can drive around that one without bouncing! So when you've reached the top part of the spiral, you can do one of two things. You can drive straight off the top of the spiral, and SSMT once you reach the ground below. Or you can start the SSMT on the top of the spiral, hold it as you fall, and finish it once you've landed. Guess which one is the quicker of the two. I know, it's annoying. But it's just one of those things. Make it so! The End You stay to the left of the road here, and aim just slightly to the left of a little tower sticking up, and just before the edge of the road, you should hop. This will allow you to land sooner and start the final MT quicker. This last MT is just a regular MT, but you'll miss it more than you can imagine, or rather, you'll hit the final corner much more than you should. Make your peace with this now. On laps 1 and 2 of a 3lap run, get an SSMT just around the finish line. Otherwise drive straight for it! A small piece of final advice. If you're not on for a PR here, or you have no intention of taping your replay, make sure to press start just before the finish line, so that you don't over-write your helpful ghost. You don't want to spend over 3 minutes setting another one up. Have fun here. Enjoy the fire breathing statues. Pay a visit to Marty, and remember to laugh when you slide. 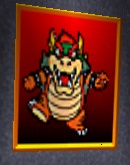 He's got his eyes on you. |