|
Arghhhhhhhhhh! Arghhhhhhhhhhhhhhhhhhhhhhhh! Goddamn $*^*È@&!?<" moles! 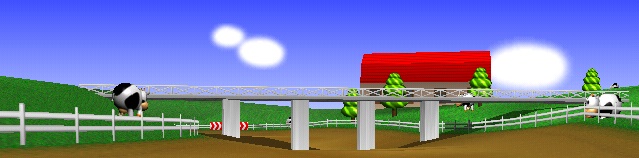 Cows are the least of your problems. Ok. Right. You want my advice? Seriously? I'm not kidding with what I'm about to say here even though you might think I am. I'm not. Look at this hat! *puts on serious hat* See this? That means I'm being serious. When I'm not wearing the hat, you can believe what you like, but....man I rabble on, I'll just cut right to it. Do _not_ play this course There, that is my advice. Don't believe that I'm seriously suggesting this as an official strat? Did you not see the hat? I'm not joking. Don't play it. Forget about it. Leave it alone. Change course. Move on. Deal with it. The only time you should play this, and the people I'm writing this strat for, are those people who are a) About to retire from kart (Hah, good luck trying that!) or b) Are at the speed to get the God/WR time. Are at the very top of their skills karting wise Nobody else should ever play this. Some people might think I'm still not serious here despite the hat, so I'll sit down and explain my reasoning to you. Since I already appear to be sitting, I'll continue. Let's say you're starting out in Kart. How much time would you say it will take you on this course to achieve an Elite F time...how many more attempts will it be before Elite D? How many moles will you hit over the hours to reach a mighty King F rank...what about King D and C. How many tears will you shed when you finally reach Legend speed and decide to come back to this course to bust out a Legend time? How many hours will you _waste_, waiting for a sweet run every time your karting improves? Wait Wait Wait I can save you many hours of your life, right here and right now. You could learn a new language with those hours, take up a new hobby, ask that cute girl next door out on a date, watch the extended edition of Lord of the Rings. Yes, trust in me, and I will save you. For every perfectly clean run around this track you get, you'll mess up 50 others due to the randomness of the moles. Wait til you're highly ranked, and come to this track _once_, and bust out a time. "But William, it says I'm ranked #45, and with the avg finish points a good mmf time would bring me, I'd be ranked #41!!". Shut up. Ok, if you're down this far it means you're ready for that once in a lifetime run. You're willing to sit there for a good few hours to get all the pieces right and get lucky with the moles. Good for you! If anyone else is reading down this far, just let me tell you that I'm very disappointed in you. Oh yes. That girl next door will never go out with you now. Ok, so first off, did you ever notice how creepy the cows on this course are? They freak me out. Especially the ones that are looking at you, because no matter what direction you look at them from, they're _always_ staring right back at you. Of course on the flipside of that are the really shy ones which won't let you see their faces no matter what you do. So my first piece of advice is just to try and avoid looking at the cows. To be fair to them though, at least they don't get in your way. 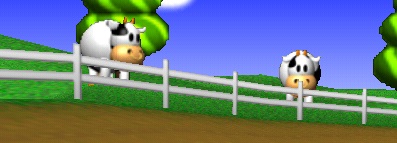
Now you see me. 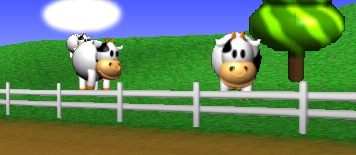
Now you still see me This course is called "Moo Moo Farm", but I think we'll all agree that it should have been called "Mole Mole Farm". Well actually, it probably should have been called "<whatever noise moles make> <whatever noise moles make> farm". I have no idea what noise they make, so that's something you can look up. And actually, since it's a farm, you'd think the farmer would have done something about his mole problem. Oh yes...*wanders off into thought*. OK, whilst the crazy William is off thinking about the logistics of farming, let's talk about the boost start. Get it! Everettize it! Done that? Excellent. Every now and then you'll actually spin out because you've timed it wrong. Even though you've done it a thousand times without fail before. It's just a glitch in the matrix. I wouldn't worry about it. Now from this boost you might wonder whether to do a left-facing or a right-facing SSMT. It doesn't really make that much difference which one you choose but I'd suggest doing a right-facing one. This is a pretty standard start for a track with nothing really interesting happening to begin with. You should release your SSMT from the boost start at the top of the first hill you come to. This will make you feel good, and lull you into a false sense of security. After this nice start you'll start to get a feel for how annoying the ground can be. It can mess you up if you're not careful, but again remember, you only need to get everything perfect on this track once in your entire life. Then you can leave it for good, locked in a cupboard somewhere. After gliding from the first SSMT you should jump into the second, and release the SSMT so that you aim to drive as close to the fence on the right as possible without hitting it. This will mean going up on the hill part of the track, but hopefully it won't slow you down too much. It's at this point where you get to choose what shroom strategy you want to use. If you think it's Miller time, you should jump into a slide and use your shroom here. Miller Time: Jump into a slide and use your first shroom. You want to jump into this sooner rather than later. It means your glide before jumping won't be as long as a usual one. Now, you may be tempted to stay as close to the fence with this shroom as you can and by all means try that if you want. It's not precisely what Ben Miller does though. He actually shrooms out a little from the fence and turns in, going around the left of first inner mole hole (in this case "inner" means "close to the fence") and to the left of the 2nd inner mole hole. His shroom runs out just after this and he releases his MT to the right of the last inner mole hole. This means that he drives over zero holes in this first patch. He compromises on overall speed in favour of consistency, which is what you need to do here to remain sane. However, since you only need to get this right one time, I'm telling you to hug that fence with the shroom, if you want to use it here. Now, this flies in the face of everything I've done personally on this course, but it's the way it has to be. And now for a word from our math department: Eh, ok. Anyways, if you don't want to use your shroom here, you have a choice...after your glide from your previous SSMT, you can choose to go completely to the left of this batch of moles, or you can choose to go through them. Going through them of course is faster, and so I'm telling you to do that, but I've mostly just gone around them myself, on the grounds that throwing my N64 through the nearest window probably wouldn't be a very constructive thing to do, and you can quite comfortably get a God time doing it. And now for a more detailed analysis from our math department:
Thanks for that guys. We sure do appreciate the fine work you do down there in the math department........nerds. That does give you an idea of what you're up against here though, and is another good reason not to play this unless you absolutely must. Ben spent so much time here that he managed to devise a route which made him miss a lot of the holes, and that allowed him to finish a great many runs, and that consistency resulted in him getting the WRs here before the great players caught up with him. So where were we? I believe we had just passed the first patch of moles. This next corner is difficult to describe. You must ssmt before the corner and you must release it so that you drive up to the very point where the top of the hill and the fence meet. At this point, you hop to the right around the corner. This hop is to properly facilitate the next left-facing MT which you perform whilst going down the other side of the hill. This is probably one of the most satisfying MTs to perform in the game, and when you release the MT at the bottom of the hill, you should be driving straight over the little hill to the left and miss the white wall on the left. Then you glide a little and perform a quick right-facing SSMT before the dip in the ground. Don't worry about getting close to the right side of the track with this MT, but there's a sign with red and white arrows on it on the righthand corner up ahead, so try to aim just to the left of that. The most important thing is just to keep the SSMT nice and simple and straighten out and glide down the dip in the ground. Now, on a flap attempt, this would be where you would use your second shroom. You'd jump into a slide and fire your shroom and pray that you didn't hit any moles. There are two ways of doing this final section on the flap. You can use the 2nd shroom and release an MT at the end of it before jumping into the final shroom, or you can use the 2 shrooms continuously. I don't think there's much difference either way, but Hab leaves a gap between the two. Also, don't be afraid of hitting moles...just go for it! If you have to retry then you have to retry, but if you finish a lap and you've compromised somewhere along the way, then you'll feel like you've wasted an opportunity and you won't be happy til you've beaten that time. So, this is your shot. No fear! Now, back to the 3lap strat. You can of course choose to use your 1 shroom per lap here, as in the flap strategy and MT around the final patch of moles to the end. Or you can use your shroom on the very last patch of moles. My own personal choice is to use it at the very end. It's not only the easiest of the 3 places (in my opinion), but it also eliminates having to do one of the trickier MTs. So those are your choices for shrooming spots. I'll now describe the normal way to MT around this bend. Start your MT from the bottom of the dip. Because of the shape of the ground, you'll need to hold the MT at white a little longer than you usually would, because you'll actually be lifted slightly into the air. You'll know what I mean when you drive it yourself. Complete this MT quickly when you land, and release it. At this point you'll very likely hit the fence on the righthand side. This is fine and is a little bit like hitting the side of the tunnel on LR. It's a healthy bounce. You should just miss the inner hole here and drive between it and the fence. The 2nd inner hole is next, and you want to slide into an MT and go around that to the left. You might think going straight over it would be the quickest, but because of the layout of the land, any gain would be incredibly small for the price you'd have to pay, and unless you want absolute and total perfection on the lap, it's not a risk I'd advise taking. This is the spot where you'd normally use your final shroom too. Hold this MT and release just after you come to the final patch of moles. You should release it to the left of the innermost hole so that you pass the next inner hole on the righthand side. You might hit the fence again, but it's only a harmless bounce. And now, finally, it's HIM. Let me tell you something about moles. There are the normal type, the normal annoying type that jump out at you and taunt you, but then there is HIM. He is the Omega mole. The very last mole on the track, and he's placed perfectly for you to hit him no matter what strategy you choose to pick, and the laws of probability do not seem to apply to him. He is, by far, the most frustrating single object in the entire game. He is the final thing that will mess up a perfect run and he is almost guaranteed to do it, and you just know that he enjoys it. I call him Monty. (Well actually you wouldn't want to hear the things I've called him over the years) 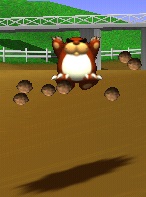
The one greeting you never want If you're just normal MTing over this patch though, you may just pass him on the lefthand side, especially if you've bounced a little off the fence after the last MT. So, if you have then jump into your final MT just to the left of this little guy and try to perform the MT before reaching the white columns. This is one of the trickiest MTs to perform because the ground is so uneven. If you can manage to perform this quickly and consistently, then you deserve some sort of medal. Usually you will have to hold your slide a lot longer on this than for most MTs, and occasionally you will hit into the rightmost column before completing the MT. This can be especially harsh, once you've passed Monty on the 3rd lap of a 3lap run. After you've released it though you should drive straight, and if you're on the last lap you should jump a little to the right when the corner lets you, so that you reach the finish line as quickly as possible. If it's not the last lap then you can just jump into an SSMT as normal here. 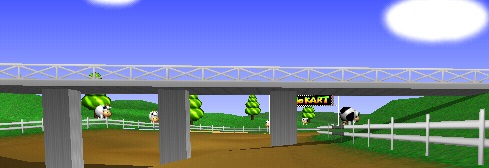
The ground is uneven. Probably because of all of the moles So that was Moo Moo Farm. Hopefully your stay here will be a short one, and relatively painless. Just resign yourself to the fact that you'll be retrying constantly and you won't go too crazy. Hey, I turned out ok right? |