One of the nice things about having your own castle, apart from being able to fire things out of cannons, swim in the moat whenever you like, and show off at
parties with stories about how you own a castle, is how secure it must make you feel. This is why Princess Peach has never once had to worry about being
kidnapped. If only we were all this lucky.
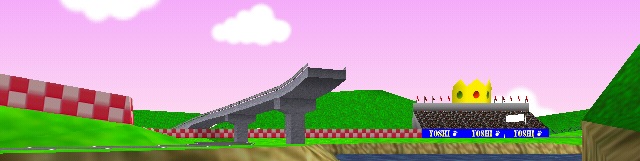 More like....Royal Rampway This is the only legitimate time in time trialling where you can have 3 of the same character on screen at the exact same time, so you should choose Peach as your character for this track. I guess technically you could use Luigi on LR, or Mario on MR, but what kind of example are you setting then for the younger generations of time triallers? They're looking up to you. Don't lead them astray. Competing with 2 identical looking ghosts of yourself on the opening straight can be quite disorientating, although alas, the course ghost Peach, or Peach Zero as I shall call her here and never again, disappears quite quickly after the opening MT. She doesn't actually do the opening MT. I don't think she got that memo. Hopefully your ghost (or Peach Beta) does an MT, or I'd be very disappointed in past you. Anyway, whatever those ghosts are doing, just ignore them and listen to me. If those ghosts jumped off a bridge, would you? Well, you should. That's part of the strat. But still, they're a bad influence, and I don't want you hanging around them anymore. So Course Ghost Peach is letting you get on with this whole first corner business, whilst she hangs back. She's probably thinking that if anyone is going to get kidnapped around here, it's going to be you, and won't you feel foolish dashing headlong into unknown turns and across trippy speedjumps when someone leaps out and grabs you. So, when you've successfully performed the startshroomslideleftmt, and haven't accidentally gone merrily into the grass (Remember, you're not a shortcutter. It's all roads and grass cuts for you...er except not here, stay off the grass).. So when you've done that thing that I said, you should be more or less pointing at the corner, and you'll probably be quite close to the left side of the road. This is good. You don't get a cookie though. A healthy glide is its own reward. Then hop into the MT for the corner, and release it quite early. The following straight will need a quick SSMT, so the earlier you release this corner MT, the easier the next section will be. The next section is a bit of a dance, and by dance I mean hectic series of movements where if you don't get them all right, in the right order, and with precise timing, you're going to look stupid in front of your friends. You should glide a little from the corner MT, but don't be afraid to underglide here. The corner coming up turns quite sharply, and you'll need time to perform the MT around it. This means jumping into the SSMT on this straight earlier than normal spacing might indicate. One of the fun things about this track is that there a number of these really rushed moments, all dotted about the track. If we include this SSMT, at least 5 MTs are squeezed in to places they weren't originally performed. It's like when you're making some flatpack furniture, and you have a few bits left over at the end. Just stick them in anywhere and it'll be fine. So overall, you're probably not going to feel too comfortable on the track, even though it's quite nice to look at. However, if you're busy admiring the scenery, you've probably already lost concentration, and the course ghost has passed you out. That's just embarrassing. Jump into the MT for the next corner early. Unlike places like LR and TT, and almost every other corner in the game, you won't be able to work up the MT whilst you're actually turning, so you need to work the smoke up to orange before the major part of the turn. You're just going to be holding left with the stick and nothing else whilst you turn, so having the MT already prepped to release is ideal. There is a school of thought that says you could possibly release the MT before the corner, but I didn't attend that school, and neither did Peach. Once you get around this corner and release the MT, you'll be faced with one of the most difficult pieces of karting to get consistently right. The road corner is in front of you, the grass is to the right, and the wall is to the right of that. You need to take this next corner right where the wall ends. Yep, up there at the top of the grassy slope. This means charging up an MT on the road, releasing it, and then either holding a slide up the grassy hill, before jumping right at the top, or hopping once or twice before the top jump, or doing some combination of all that. Basically you want a really nice clean hop at the top of this grassy hill. How you get there, is up to you. It's not easy, and nobody does it well all of the time. Have fun messing it up in many different ways. 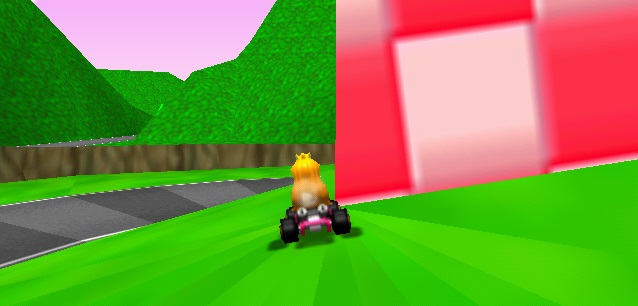 A clean hop is your only hope. Also obiwan kenobi. When you land, you should ideally land into a landslide...this is less like an actual landslide, with the scariness and possible death, and more like a slide upon landing. The exception to this is if you're going to end up too far to the left and the slide will take you into the grass. If you feel you're too far to the left, take a quick correcting hop to the right, before hopping into that right-facing SSMT, or use that correcting hop as your hopslide. The third option brings in a possible double-shroom spot for a fastest lap attempt. When you land into your slide, you should arc to the right over to where the grass meets the road (I know..basically I have you pointed at everywhere). At some point along this road, the grass will turn into grass you can shroom into. If you know the polygon divider to look for, you should be able to hit this part pretty consistently. 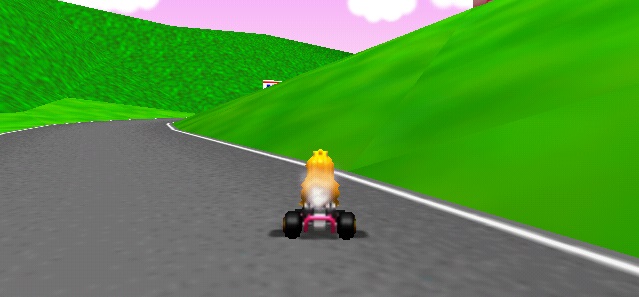 The royal polygon divider What you won't be able to do consistently is the following double shroom. The first should be fired the instant you touch the grass, and you will sail up the side of the hill and close to the wall in your little kart boat, and then just before a small valley in the grass, you should fire the second shroom. If this goes well, you should bounce off the side of the little grassy valley wall and keep going til you hit the road. If it doesn't go well you're going to just end up motionless and alone in that gap. Maybe you'll pathetically slide slowly downwards, because not only are you a bad karter, but you're also a very slow retryer. This spot was popular for many years, and some of the best times on this track still use this spot, but it's not easy to do consistently, so many people have swapped to the new shroomzones. If you haven't decided to brave the double-shroom of Peach Mountain, you'll probably have completed your landslideMT and have your little kart pointed towards the next corner. This next bit of the track is a little like the first bit of the track. You're going to do an early MT, then an early SSMT, and then a final MT. The difference between here and the first corner is that all of these MTs are much easier to perform, and you shouldn't be rushed by any of them, especially if you release the first MT early into the next straight. A lot of people might want to leave out the SSMT here, as it's one of the 5, but it's easy to add in, and everyone should be doing it. You don't want to be uncool do you? At this point - the point where you're doing the final MT around the corner - you have a choice. You can either complete a full turn, and release the MT into the straight pointing towards the next corner, or you can go on a fastest lap adventure. If you want to go on the adventure, release the corner MT so that you're pointing slightly to the left of the right-most tree. There are 2 trees here. You'll know the one. Just as you're leaving the road, hop and land into a left-facing shroomslide. This should take you on a path from the left of the tree to the road ahead. Cut across as much of this grass as your shroom will allow before rejoining the track. Of the three spots, this is the hardest to mess up. You should be able to do it consistently, and not lose or gain much time with each attempt. 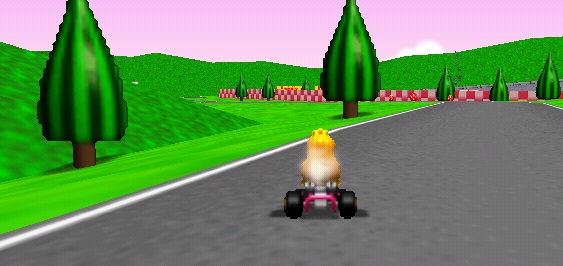 The easiest shroomspot. We'll replace it with a harder one in the future. If you haven't gone on that cross-country adventure into Peach Wilds, then you should be pointed at the next corner instead. The simplest thing to do here is to get an MT around it. The hardest thing to do here is to do a quicker MT almost around it, with a view to doing a quick followup SSMT. Of all the 5 SSMTs on the track, this is the newest, and one that you can probably leave out without too much damage to your time. Next up is the regular 3lap shroomspot. There's a wall along the right, and you'll want to pass right by the point where it ends. There's lots of disagreement as to whether to go in early, middling or late with this shroom. My feeling is that middling to late is better, and you're less likely to hit the wall. When you're ready to make your move, hop into the grass with a slide and fire the shroom, when you reach the end of the wall, hop like crazy around it a few times, and then slide back onto the road with an MT. If you've done that correctly, you'll be faced with the unnecessarily large ramp of death. If you're scared of heights, this is probably a good time to stop confusing mariokart with real life. The first obstacle is the little speedy arrows on the ground. You should treat this like it's a shroom and slide into it, and release an MT as soon as possible when you're passed it. This straight is quite narrow, so a lot of the time you're going to bounce off the walls here. It's not a terrible thing to have happen, but all the gain in your following SSMT will be lost if you hit the wall. This next SSMT is not amazingly important, but you should try to fit it in for practice anyway. Doing quick and narrow SSMTs is a valuable tool for any track, so you can use this skill in many places. It doesn't matter if it's left-facing or right-facing. That applies to the previous SSMT you did too. When you've done all that. Keep as straight as possible and brace yourself, because you're just about to launch off the ramp. Wheeeeeeeeee! 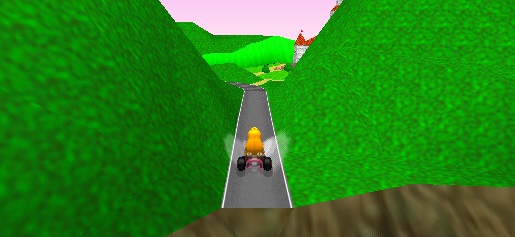 Aghhhhhhhh. It's too late to turn back now! Some people say they bounce when they land. This never happens to me, and it should never happen to anyone. When I'm flying through the air, I hold the brake for a little while and then I triple tap A and then hold it for the landing. I don't think the triple-tapping is important at all, and I'm not sure the braking does much good either, but it's a little habit I got into and there's not much else to be doing when you're flying through the air. Of course, flying doesn't really describe what you're doing. What you're doing is falling, and falling quickly. Thankfully instead of instant splattifying death, or moon bounces, you should just hit the ground and continue driving like you were on the road all along. "Whatsup road". When you land you'll notice a little side-road off to the right. Peach's Castle is here, and the castle and grounds are almost identical to those found in the game Mario64. It's quite a nice place to take a visit to, although obviously it's perfectly useless for time trialling purposes. When you're tired of all the endless squeezed in MTs and choice shroomspots, pull into the castle grounds and unwind. 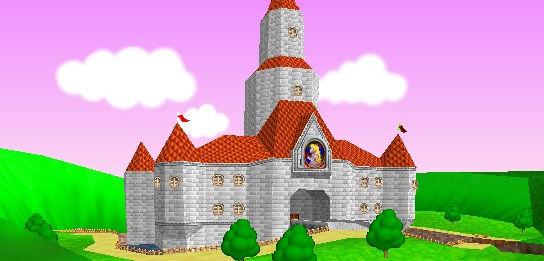 I wish I had a castle. Soak in the relaxing vibes of the castle grounds. Once you land, and I mean the moment you touch the ground, you should perform a left-facing SSMT. It has to be done pretty quickly, because the next MT around the bend is coming up fast. This is the 5th and last squashed in MT-spot, so you can just leave it out and just perform the MT around the hill, but if you've done the 4 tricky ones previously, there's no point stopping now. The next 2 bends are quite tricky. After this corner is a little slight turn to the right, where you have to perform a very annoying right-facing MT. It's very easy to miss this one. There's very little about this track that's actually easy, but luckily it's nearly over. Once you've performed the quick right-facing MT, you have another tricky corner ahead. You have to perform a left-facing MT around it, but you should release the MT before you're fully around the bend. You have to release it so that you're driving straight off the track into the grass. Do a little hop before you touch the grass or it can grab you and slow you down. So hop straight into the grass, and once you land, hop into a right-facing MT back onto the road. To finish up the lap, perform an MT around the final bend. This is also a tricky corner to navigate without falling into the grass, because Royal Raceway isn't done with you until it's done with you. 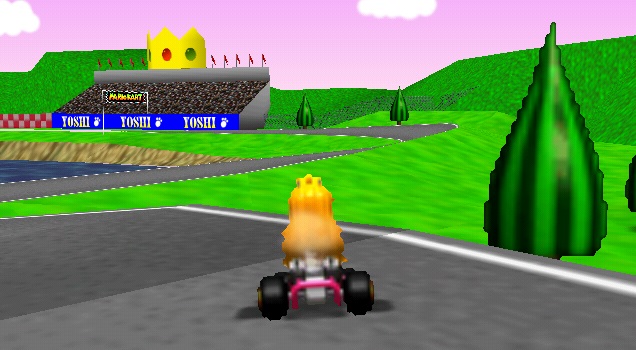 Jump into the grass around here If you're going for a lap record, this last corner is the final shroomspot on the track. You do everything like you do normally on a 3lap run, except instead of doing the final MT around the corner, you slide to the left into the grass, as soon as you can do it without falling in the water. Once you hit the grass, fire the last shroom and ride it to the finish line, or more specifically to the left of the finish line. You might think that firing your shroom just before you leave the road would be much better, but it doesn't work out too well when you do that. From the moment you land from the jump, til the moment you cross the finish line, you'll have not a moment to breathe, so take some deep breaths when you're falling through the air. It's the only chance you'll get! 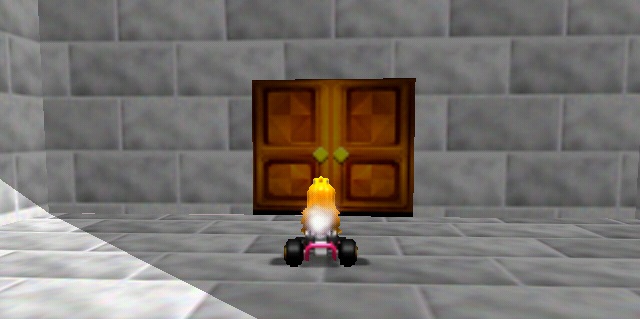 Now, where did I leave my keys... |