
Satellite Transmissions - Images from Space!
Hey Brickies!
This week, I held a talk right after the recent EGM, about a cool topic that I felt like sharing to more people like myself (nerds - uhhh, I mean fellow Brickies! …) Not a lot of folks had heard about the act of intercepting transmissions from satellites ~800km above our heads, or even that it’s possible. That’s where me and my ramblings came into play…
Unfortunately, a few people who were interested in listening to me talk about satellites were unable to attend the Hackerclub event. I thought to myself, “Great! Less eyes on me, less nerves for my first ever talk!”, but these people genuinely wanted to know more about the subject (Am I just the best hype-man or what?!)
So, this blog post is a little recap of what I talked about for those who did not have the honour of listening to me yap on about it in-person! Welcome to this Redbrick recap on this week’s Hackerclub: Satellite Transmissions, as a topic and as a hobby!
A little bit of Trivia…
So, for those who have absolutely no clue about satellites, for your information, there are around 8,377 active satellites in our humble Earth’s orbit; and most of these lie within Low Earth Orbit (a distance of 2000km.) In total, there are between 25-28,000 objects orbiting Earth. I don’t know where we all signed off on putting a bunch of junk so close to our orbit, but that’s a conversation for another day. The United States are responsible for around 3,000 of the currently active 8,377 active satellites, thanks to huge deployments from companies like SpaceX et al. Satellites that orbit us are primarily used for communications, positioning, Earth observation and navigation.
The most notable (man-made) object in space is probably the International Space Station, established in 1998. It was founded for housing astronauts and cosmonauts in space for conducting scientific research and international relations. It’s still up there, about 400km above our heads, somewhere between us and the stars. It serves as a great example of international co-operation, especially between the USA and Russia post Cold War. You can see a live stream of a camera that is fitted onto the ISS via official websites and also Youtube live streams. You can also track its current position in relation to Earth on the website n2yo.com. More on that site later.
Another organisation that uses satellites actively is the National Oceanic and Atmospheric Administration (NOAA). This organisation deployed a fleet of 11 satellites for Earth observation, including weather research purposes. Some of these satellites, the GOES- series, are geostationary satellites, meaning that they stay in the same position (relative to us on the ground) as the Earth rotates. However, some of their other satellites, the NOAA- series, are known as polar orbiting satellites, which orbit about the Earth’s poles. These, when observed in person, appear to move in one straight line across our skies, and in a wave pattern when tracked on a map (as seen on N2YO.com) In fact, some of these NOAA satellites pass over Ireland from time to time. Let’s circle back to that in a while…
Well, what’s it to me?!
Well, reader, most satellites operate behind encrypted data transmission or communications for security or privacy purposes. After all, most of these satellites are used for government services or to provide mass communications to civilians back home. However, all satellites (that you are allowed to know about, at least…) are tracked and can be mapped live, using handy websites such as the previously mentioned N2YO.com.
Best of all, certain organisations have even pulled the curtain back a little bit in order to allow civilians to intercept some Earth-bound transmissions via amateur radio frequencies. So, for a select amount of satellites, you can tune to a certain Downlink frequency and receive packets of data as the satellite passes by us at several kilometres a second. Pretty cool, right?!
There are a few other examples of data transmission that can be intercepted from certain satellites. The ISS and some other satellites may host Slow Scan Television events on certain transmitter test periods, or notable dates/anniversaries; over the course of a few days, a similar method to before is used to transmit data that, when decoded, displays a picture! These can be thought of as a sort of postcard that has been ‘sent’ to Earth by certain satellites. Some satellites may also facilitate repeater functionality for amateur radio, so that you can communicate to other hams across the globe (don’t get me started on amateur radio, whole other kettle of fish). The ISS can even facilitate amateur radio contact, so you can talk with astronauts on board!

I frequently follow the schedules for when the NOAA- satellites pass over Ireland (and transmit in amateur radio,) so that I can listen in on these frequencies. As the satellites reach their maximum elevation for a passover, you can hear the data transmissions come in through the radio/radio software you are using (more on these two later). If you tune in via any old amateur radio device, such as a Baofeng UV5R, you can record the data being transmitted to be decoded in to an image. There is another method to get a cleaner output, such as using a Software Defined Radio (SDR) Dongle paired with SDR software, to get it directly to your laptop with much less background noise.
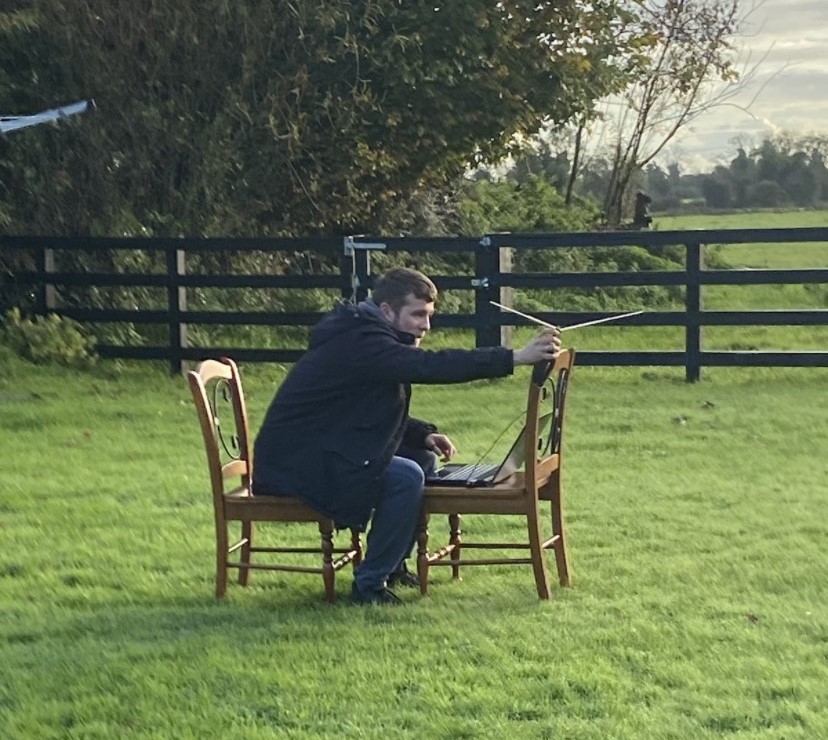
Me in my jim-jams using SDR software and bunny ears to catch a passover from my back garden! Credit: My dad for taking a photo of me looking like a tin foil hat person.
Hint: The main satellites for NOAA passovers in Ireland are NOAA-15, -18 and -19. These, to my knowledge, are the only satellites in the fleet that pass over Ireland AND transmit via amateur radio.
Here’s one of the photos I’ve got from passovers from my back garden:

So, wanna learn how to do it? : )
The Tutorial (Finally!)
Lets start with the amateur radio tutorial. Here’s what you’ll need:
- An amateur radio
- An android phone with the application ‘Android Wave Editor’ installed.
- An open space, such as a field or garden with few obstructions.
Start out by going to N2YO.com - bear in mind it is quite an old site, so it is a bit werid to navigate, but it’s great for what we need it for! Sign up for an account, and create a location i.e your house. Set your current location to this, and navigate to the Most Tracked list in the top navigation bar. You will easily find the NOAA- satellites here. Select either NOAA-19, -15 or -18, and select the 10 day predictions. Your screen should look like this:

This shows a list of times where NOAA-15 will pass over the selected location; it is also colour coded based on how visible the satellite will be, from white (barely visible) to orange (very visible). However, the more important column is the Max section, which lists the time at which the maximum angle is achieved. This is when the signal will be clearest for a clean recording, so even if you are late to the start of the transmission, as long as you aim for this time in bold, you’ll catch it at its clearest. Also, pay attention to the Max El. angle. You want a passover where this number is above ~70 degrees, and the closer to 90 the better. On this page you’ll also notice the Downlink frequency; take a note, as this is what you’ll set your radio to.
Next step, wait for the passover! Get out in to the open space a few minutes before the start (not before the peak, or you risk running late and missing the Max elevation!) and get ready for the satellite passing. Make sure you are clear of buildings in your surroundings. If it’s windy or rainy, this may affect both the reception of the transmission and the quality of your recording. So if you have a good passover on a bad day, maybe consider rescheduling to another time/day, so you get to increase the quality of your interception and so you can keep that equipment nice and dry!
Tune in to the Downlink frequency a couple of minutes before the passover is scheduled to start, so that you can hear the frequency fade in, and it allows you ample time to set up the recording application.
Also, look up. If it’s clear, you may even spot your satellite passing overhead! Using the N2YO live map you can see its location, and can see what direction the satellite travels. It should look like a dim star, that is moving and doesn’t glisten. (Visibility isn’t necessary but its cool, right? Right!!! Just me?? I hope not…)
Pay attention to the Max elevation time, and start recording ~ 1 minute before this time; you’ll notice that the signal will clear up significantly coming up to the Max El. time. Hold the antenna vertical and relatively close to your chest, ~ a foot away (your body can act as an antenna and help with reception- seriously!) and with your other hand, hold the recording device up next to the receiving radio device; within one foot should suffice. This will allow for as clean of a recording as possible.
Once the signal starts to fade out, you can stop recording and save the file as a memorable name to your phone. Then, re-enter the audio file and export as .WAV with an encoding value of 11025 (this should be the default settings for export.) Choose a memorable name discernible from the unexported file. I tend to use the date and time of the passover as my file names, and then add an ‘exp_’ to the start of the file when exporting.
Last few steps! To decode your audio file, navigate to https://apt.open-weather.community. Select the Choose File button, and upload your exported .wav. Keep the same settings selected that the website provides (Absolute Value), and then decode!
Wait a moment for the magic to happen, et voila! All going well, you’ll have a looooooong image that somewhat looks like an aerial view. Mess around with the channel settings and the seconds input to try catch a good part of your recording. Then, press and hold to save.
All going well, you can tell everyone that you have successfully detected, intercepted and decoded vital observation data from a foreign nation’s active orbiting satellites, and be a big flex on all your friends who are none the wiser! (or who do not really care!) Easy, right?
You’ll get the hang of it. It’s like riding a bike.
Laptop Tutorial (sort of)
The next tutorial is with the use of SDR software on a laptop and equipment, and is a little trickier to set up. HOWEVER, this blog would probably be about 300 more lines if I were to go into each intricacy of this tutorial. As I did in Hackerclub, I am just going to recommend this video I got the tutorial from, a channel called ‘saveitforparts’ on YouTube. He can explain it 10x better than I can express in a text passage, as well as the previous amateur radio tutorial, so check it out! (Also, be sure to check out the other videos on his YouTube channel; it’s a great dive in to a bunch of niche hobbies/tutorials to do with satellite transmissions and beyond!)
If you’re brave enough, there is a Raspberry Pi image for decoding in the description of that video - do this at risk of your own sanity, link is in the description of the video.
With this tutorial you’ll need:
- An SDR antenna kit
- A noise reducer(Optional, helps with reducing noise on the transmision!)
- A laptop with SDR software installed (such as SDR++)
- Decoding software (such as SatDump or NOAA-APT decoder)
Things to keep in mind:
-
DO NOT under any circumstances press the transmit button on your radio without an amateur radio license. This is illegal to do, even if there is no transmission on a frequency. It is also illegal to do. Did I mention it’s illegal? Please do not press the transmit button. I claim no responsibility for ComReg going Ruby Ridge on your ass. Please be careful, and if you cannot trust yourself, you can unbind the transmission button.
-
Satellites as they pass overhead are subject to Doppler Shift. You may notice on your SDR that the visualiser starts to slowly move out of the focus that you have set, or you may notice the audio become slightly static-y as the passover continues. You can mitigate this a little by changing the frequency to counteract the Doppler Shift, but this eventually leads to the signal disappearing once the transmission is complete. You shouldn’t have to shift more than a couple of Mhz either side of the original Downlink.
-
With that being said, if you’re using a handheld amateur radio, tilt the radio in the direction that the satellite is currently positioned. This may help to polarise your receiver with the transmitter, and get a better signal overall.
-
You should be wary of fake SDR kits when purchasing equipment. Keep to the link I sent in or the links in any of the tutorials that you will watch, as fake dongles may be malicious or tuned to the wrong frequencies. Any of the links in saveitforparts’ video should be fine.
Anyways, 109 lines is an awful lot of yapping on my end, and my fingertips agree with me. If you found this blog interesting, useful, amazing, best thing you’ve ever set eyes upon etc, please do leave a comment below. Also, if something goes awry in your setup, or you would like some help with navigating any of the steps, drop me a comment and I’ll get back to you as soon as I can - I am more than happy to help : D
Either way, thank you so much for reading, Brickies. Take it easy, happy intercepting!
~browner